DSLR cameras for Solar imaging are a popular way to image the Sun. Our editorial staff often discuss how to best use their mainstream digital cameras for astronomical imaging. Surprised? Truth is, many of the most amazing amateur celestial photos are captured with mainstream terrestrial DSLR cameras.

As with traditional astrophotography, DSLRs offer lots of options for imaging the Sun. You can shoot the Sun as a sequence of multiple images or target a single exposure.
However, it is important to remember when using DSLR cameras for Solar imaging to be sure when using your DSLR for solar imaging, eye safety is still paramount. Don’t look through your camera viewfinder directly at the Sun without an appropriate solar filter. Also, by imaging the Sun without a filter, your risk permanently damaging your camera’s sensor, certainly not the result you want from imaging the the Sun!
For short-exposure photos, you can image with your DSLR supported on a tripod (with a solar filter attached to the camera lens, of course). For longer exposures, you’ll want to mount your DSLR on a special tracking device that compensates for the apparent movement of the Sun caused by Earth’s rotation.
With a basic computerized telescope/ mount, you can image the Sun through the telescope (with a filter attached) by attaching your DSLR to the telescope’s focuser using low-cost accessories such as a basic T-adapter, along with a T-ring specific to your camera model.

The telescope mount’s built-in tracking will keep Sun’s image in the frame as long as you choose
When using DSLR cameras for Solar imaging, you’ll need a solar safe filter. Many astronomy retailers sell off the shelf filters that will fit many DSLR’s. Just do a search for DSLR solar filters and try to find a filter that fits your particular camera.
Or, you can build your own filter. You can check out this detailed article on building your own DYI solar filter for under $50. And for that $50 the author actually built filters for four optical rigs including telescopes and binoculars. He uses Baader solar film available from Astro-Physics.
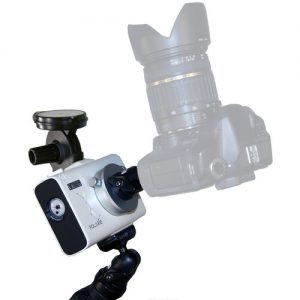
Once you have your camera solar ready, you really should consider a tracking mount. There are several great (and inexpensive) options available. These include the Vixen Polarie Star Tracker which attaches to a standard camera tripod and can accept any digital camera weighing up to 7 lbs.
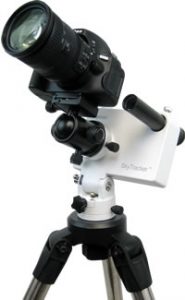
Another great option is available from iOptron. Their SkyTracker tracking camera mount also attaches to a standard camera tripod and can accept any digital camera weighing up to 7 lbs.
And the great news is, once you get your camera outfitted to image the Sun, you’ll also be set to step into nighttime astroimaging.
The American Astronomical Society (AAS) has created an excellent tutorial about using DSLR cameras for Solar imaging. In addition to providing an in-depth overview of using a digital camera for Solar imaging, they also provide links to numerous helpful sites that provide handy information, such as a shutter-speed calculator for solar eclipses and recommendations for ISO settings, f-stops and exposures. To view click here.


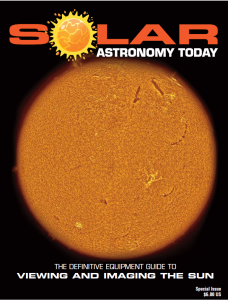
The sun is more active than its been in years! If you’d like to learn more about the technology behind solar observing, solar imaging and more, you can check out our free publication, “The Definitive Guide to Viewing and Imaging the Sun”. You don’t have to sign up or provide any information, simply click here and enjoy reading!
And if you want to learn more about telescopes and more products used in amateur astronomy you will enjoy the extensive news, articles and reviews that are only available in the magazine pages of Astronomy Technology Today. We are offering a 1-year magazine subscription for only $6! Or, for an even better deal, we are offering 2 years for only $9. Click here to get these deals which only will be available for a very limited time. You can also check out a free sample issue here.

